When you think about your writing style, it’s easy to feel caught between an amorphous blue cloud – a sense of self, unrealised or indefinable, an elusive mystery – and a bristling red pen, scratching things out and dictating schoolish rules.
Like most writers, I started with no idea what My Style was, beyond a vague hope that I must have one (surely?) and an iron conviction that I was a Good Writer. I wrote my entire first novel like that. Looking back, it was mostly transparent prose in literary register, with some of Angela Carter’s influence on immersive description, and some of AS Byatt’s influence to pare that back. It did work out as a decent style, because I had good models, but it wasn’t mine.
In fact, I’d written an entire novel without using one of the most powerful tools available to me: its style. I was like an artist whose composition and perspective are coming along nicely, but who hasn’t yet discovered colour. To take the metaphor further – there’s nothing wrong with using just black and white; monochrome artwork has a fantastic tradition. But to stick to that just because I didn’t know about colour, or know how to use it – that was missing a trick.
Almost 13 novels later, I still can’t tell you what My Style is – not because it’s stayed amorphous and mysterious, but because I have many. It depends what I’m writing. Our writing styles are always plural: our own voices change and grow continuously, just as we do, and shift like a ventriloquist with different genres, stories, and character voices. I have many colour palettes at my disposal now. And I know when to choose monochrome.
So how do you go about finding your style – or indeed, styles? Will working on your style spoil its authenticity, pruning back the very things that make it yours? And won’t a course on style just teach you to write like someone else?
How you do you find your style?
Most of us start by copying other people’s styles, as I did – and that’s fine. It’s a great way to learn. The writers you copy can be a useful indicator of your own taste in style, too: who do you want to write like? Who do you want to influence you? Who do you not want to influence you, even though you like their stories? Having a sense of your own tastes and working with good models is a great start.
From there, you want to strike out further – “breaking the rules”, writing the way you’re “not supposed to”, giddy with a sense of daring, playful and perverse. It feels naughty and wrong, because you’re no longer copying something you’ve seen before. You’re writing your way.
Don’t worry about overdoing it. You can always trim it back in an edit, if you need to, but it might turn out that you don’t need to. You might become even more daring.
It’s about permission to write “improperly”: again, in ways you haven’t seen before. So here’s your permission: write improperly. Go wild, do whatever the hell you want, and see how it turns out.
Will working on my style spoil its authenticity?
It’s tempting to see our first drafts as a pure untouchable thing, the original expression of self, and to think that tampering with a word would sully it. But your self is as much there in the editing process as in the writing, and we’re always developing as writers, even across a single piece. The you that’s finished the short story has more writing experience and more knowledge of that story than the you who was writing it.
Our first drafts, if we’re really writing freely, are often a patchwork of several things. Our most unusual and original phrasing leaps out, because we didn’t censor it: hurrah! The most familiar copy-paste phrases (the clichés, the collocations) flood the page too, because they’re right there, at your fingertips, on the shelf, on tap, easy as pie: that’s fine. When we’re making things up, we often need to grab whatever language is to hand, to capture our ideas.
Some odd things happen, too. The –ing words that felt so lively and energetic in the writing feel limp and flimsy on a reread. Those unstoppable tumultuous sentences that seemed to gallop through the action are now slowing it down. That slew of vivid emotive adjectives now feels syrupy. And so on. Some of our choices are about the process of writing, not the final effect we want.
So, we start tinkering. We consult our own tastes, for what to keep, We consider the experience of reading it, not just of writing it, for the effect we want. We wash away some of the mud, so the bits we want to keep sparkle, and we add some flourishes.
Your thoughtful assessing mind is just as authentically you: this is simply another, equally authentic, part of the process.
Will a course on style just teach me to write like someone else?
Not if I’m running it! I actually held off teaching anything about writing style for the first 8 years of running courses and workshops, because I was concerned about exactly the same thing. I did not want to create some School of Megan! Over those years, I gained a lot more experience in varying my own styles, in noticing and appreciating the different strengths of various styles, and in helping my students refine their own styles through individual feedback. Then I felt ready to teach style, in all its glorious possibilities.
That's why the Writing in Style course isn’t about The Correct Way To Write: it’s about the many various ways and why we might choose each. There are some common principle of good writing across styles, which we’ll also explore, and you’ll look at how to use those for the style you’re working on, for the piece you’re working on – and when to ignore that principle, because you want a particular effect.
Above all, the course is about finding freedom: the freedom to be you on the page and the freedom to experiment with new approaches. You'll explore a wild range of styles in your writing, build your confidence in writing first draft, and develop a repertoire of techniques to refine and enliven every page – all through imaginative adventures in language and storytelling. This is your chance to experiment, to discover all the ways you can experiment, so you can choose the colour palette you want when you’re writing.
It’s a fair question. Writing a novel takes a lot of time and dedication. Some people will rush in to say “Nooo! Never give up!” But if you’re asking, it deserves consideration. Maybe that specific novel is something you’re ready to ditch; maybe it’s become an albatross around your neck. You don’t have to carry on if you don’t want to. It doesn’t make you a quitter.
Or maybe you’re having a standard creative crisis point, the ones every writer and creative gets, but you don’t know about those yet. And if you ditch this one, the next project will reach the same crisis points – precisely because they are standard.
It’s not a question I can answer for you. But I can pose the questions which will help you decide and I can tour you through the standard crisis points you might be having.
Over the last ten years of courses and workshops, I've found that whatever the topic, there are some tips that are useful for every class. And when a student gets back in touch years later, these are the things they say they still hold onto. These aren't the nitty-gritty writing advice on specific topics – rather, they're the simple practical tips and principles that unlock a whole new approach or resolve a problem that felt like an inevitable part of the writing landscape. I rarely teach by standing in front of the class and declaiming, but now I allow a couple extra minutes in each class for a spontaneous Preach on whichever tip will help most right then. So here, in higgledypiggledy order, are my best tips for you.
1 Get a fountain pen
Writing by hand, if that's physically possible for you, is brilliant. There's good evidence that we consistently produce more, of higher quality, writing by hand - and this is from 2009, well after you'd expect most people to be more adapted to devices. Writing by hand quickly becomes tiring though, if you're using a ballpoint. Most pens, ballpoints especially, rely on friction to pull the ink out. That means you have to press down harder and you also have to hold the pen tighter. If you've ever shaken out your hand after writing lots by hand, that's why. Fountain pens, on the other hand, don't rely on friction: you can hold the pen light as a feather, glide it across the page with the nib just touching, and still get a lovely line. Suddenly you can write by hand for hours and never cramp up.
A few tips for fountain pens:
You don't need to spend a lot to get a good pen with a good nib. I usually have a £20 Parker fountain pen. At the moment, I have a £10 Helix pen and it's a dream to use. Paying a lot for a fountain pen usually just means you're buying a more expensive case, not a better nib.
Choose a pen thickness that suits your hand size. The very narrow pens are too thin for my size-7 hands: I prefer a slightly thicker pen. You do you.
Stock up on your pen's ink cartridges and stash them everywhere: handbags, pockets, pencil cases, drawers. Never be without ink.
Don't let anyone else use your pen. The nib gradually shapes to your handwriting.
Don't drop your pen on its nib. That kills it. (And I'm dyspraxic, so that's why I have a £10 Helix pen these days.)
If you're left-handed, you might find that fountain pens smudge too much for you. In that case, look for a pen that doesn't need any friction - fineliners are a good option and some gel pens. To test a pen, hold it lightly between two fingers and drag it gently across the page. If it leaves a clear line, it's a good 'un.
2 Have a writing bag
This applies even if you're not leaving the house. Your writing needs a safe home to live in. Most people quickly find that they migrate about the place when they write, if not between parks and coffee shops, at least from room to room. I have a big leather satchel I found in a charity shop for £5 and beeswaxed back to loveliness, which trundles around with me – pre-2020, between my parks, pub gardens, and meadows; the last year, from room to room. Having one place where all the current writing lives helps you look after all those handwritten pages, plus any time you scribble a random idea on a receipt or an envelope, you have somewhere to put it.
One important tip: write your name and contact details on a piece of card, along with an urgent plea for the bag's return, and put it in the bag. Even if you're not leaving the house for another three months. Something about writing can turn even the most organised person into a dazy dreamy forgetful ditz, and you really want that note to already be in the bag so that when you're halfway home on the bus and the waitress finds your bag, they can phone you. (Thanks, Agne!)
3 Mess up the blank page
Often, at the start of a writing activity, I'll see half the class frozen, pens poised and unmoving above the endless perfect drifts of white that is the blank page. They're trying to work out the right way to start, the right first sentence. They're probably wording the sentence in their head and then trying to remember how it started when they get to the end. Sometimes an entire class is sitting in suspended animation, pens hovering.
At that point I get everyone's attention back, show them a blank page, and tell them to copy me, and then I scribble all across the top, as messily as possible. I get them to do the same. I usually try not to swear in class, but for this I make an exception: "Right," I'll say. "Now you've already f'ed it up, so you can't f' it up any more than it is already." And all the pens start to move.
You can mess up the blank page however you want. Tear it out and crumple it up then smooth it out again. Scribble all over it. Start with a deliberately rubbish sentence or by describing the weather. It doesn't matter how you mess it up, anything that gets your pen moving and helps you remember that you're writing a draft, not carving words in stone.
4 Stop in the middle of
... a chapter, a scene, a paragraph, even a sentence. Our natural instinct is to reach a logical stopping point (the end of a chapter, scene, paragraph) and then stop there. It feels tidy. But that backfires. The next writing session, you not only need to Start The Doing Of The Writing, but you also have to start a new sentence / paragraph / scene / chapter. These days, when we do writing exercises in class and time is up, I give everyone about a minute's notice and the ritual reminder "If you want to carry on writing this later, remember to leave yourself a half-finished sentence."
Starting The Doing Of The Writing is always a little challenge and that half-finished thing makes it so much easier. I've learnt to not even Start The Doing Of The Writing: I get my writing stuff out, put on my playlist, light my favourite writing candle (fresh grass), make a coffee, and then sit down, not to write, but to read. I reread what I wrote last time and then I come to a half-finished bit and I'm already there, pen in hand, and oh look, I'm carrying on.
Leaving something unfinished has another bonus. Unfinished things take up extra headspace, nagging at our attention, which is why for most things we want to finish the task, close the tab, complete the admin, to save that headspace. For writing, though, we want it to be lurking around in our minds, prodding us with extra ideas, interrupting a box-set binge with an important realisation that the word "brandish" would be just perfect in that scene...
5 Write badly
If you're not prepared to write badly, you're not going to write much of anything. Many people think that early in a writing career, you start off writing badly, and then as you get better, your writing improves. Nope. The finished product may improve, but learning to write badly is an essential, valuable skill that you'll return to throughout your writing life. Any time you're having a difficult word day, any time you're trying something new, any time you're not quite sure how this is going to go, you need to write badly to write anything at all. Again, if you're not prepared to write badly, you're not going to write much. So write it badly. That's fine. You can fix it later.
Many people think they have to write it well the first time, because they haven't yet learnt about or experienced the drafting process. We don't write Alice-in-Wonderland style: "Start at the beginning, carry on until the end, and then stop." That approach might work well for your first few stories or poems, but then the moment they don't just "come out right", or you're having a bad day, you're completely stymied. Your first draft is the beginning of the process: everything can be changed, reshuffled, deleted, enriched, or pruned later. Once you've taken a couple short stories or poems through the process of reworking, editing, and finessing them, you'll discover a whole new freedom in your first drafts: it's fine to write badly, because you know you really will fix it later. And in that freedom, you discover whole new worlds of exciting ways to write.
I write my first drafts a lot more badly now than I did fifteen years ago. And my final drafts are a ton better for it. I tell my students that "Perfect comes last" – not that we're not allowed to be perfectionist, or that perfectionism loses some hare-and-tortoise race, but that it's the last stage of the process.
6 If you can't think of 1, think of 20
A character name. A location. A first line. An object for a character to be holding. An ending. Any time you're struggling to come with one, come up with 20 instead. One has too much pressure: it has to be the right one, each idea gets smacked with different perfectionist criteria every time it pops its head above ground, like an unhappy game of creative whack-a-mole. If you're writing 20, the rubbish ones are free to come parading out and the good ones sneak in alongside them.
7 Creativity loves constraints
Whenever you're struggling, add constraints. We hear a lot about the need for "creative freedom", but creativity responds a lot better to constraints. If I tell you "Write a story now about anything", you'll be stuck. If I tell you, "Write a story of exactly 200 words which includes a mermaid, a bobbin, and church bells," you can get to it pretty quickly. You might be furious that I said mermaid and want to write about a merman or a merperson: great! Rebelling against a constraint is also a shaping factor.
Depending on what you're writing, you can use all sorts of things for constraints. In poetry, we have heaps of forms that act as constraints. In fiction, any of the Story Elements could be a useful constraint: decide it has to be in a weird location, or from an unexpected point of view, or can only be written with dialogue or without dialogue. Give yourself a very specific length it has to be. Try some unusual stylistic choices: all the sentences have to be very short or very long, it has to be super-casual or super-formal, this bit of the story can only be told through documents... Draw blocks on the page and write inside the blocks, draw leaves and write inside the leaves, whatever constraints you can add, do, and the writing kicks back to life.
8 Quantity not quality
Whenever I tell my students "We want quantity, not quality!" I get at least one student saying what everyone's thinking: "Err... don't you mean quality, not quantity?" Nope. The quality will come, but not by sitting there earnestly trying to produce Quality And Only Quality. This harks back both to learning to write badly and to think of 20 when you can't think of 1, but it's worth repeating as its own separate mantra. If you focus on producing quality, you will steadily clam up into increasing rigidity, tension, and inability to produce. If you focus on producing quantity, the quality will come out, along with the rubbish and the unexpected and the silly stuff and the overblown stuff, and new discoveries and better ideas. Creativity doesn't respond well to a gatekeeper standing at the edge of your mind / pen demanding of every word and idea: "IS THIS GOOD ENOUGH?!" You can decide what's good later, once it's there. The good stuff will be there. It may seem a wasteful way to write, but when you see the head of steam you can build up and the speed with which you write when you stop judging and holding yourself back, it turns out it's a lot faster – and produces much better quality.
Another mantra for this is "You're here to do it, not to judge it," which I heard from my art teacher. He followed it up with, "You can judge it in two weeks' time." I still remind myself of that, when I freeze up on a first-draft scene or a new poem.
This applies to coming up with ideas, to poetry, to fiction, to every aspect of early drafting. You can judge it later, choose it later, and fix it later, but start with freedom, not judgement – and the way to find that freedom is "quantity not quality".
9 Set time, not goals
We're constantly told that to be successful, we should set goals. Goal-setting is an excellent way to... stymie yourself, shrivel up any shred of joy in your writing, and lessen your productivity. Setting goals for your writing is like starting a soil-salination programme for your crops: you won't see full results overnight, but in time you'll have acres of arid, lifeless soil. You might still be able to grow a few things, by hand-watering and hand-composting each one, with back-breaking labour and blood, sweat, and tears, but it won't be fun, and it won't be lush.
This might seem an extreme way to put it, but we're so brainwashed into Goals Goals Goals that it deserves a brutal metaphor. The truth is, goal-setting backfires. A lovely study at the University of Chicago and the Korea Business School explored goal-focus versus process-focus on a wide range of activities, and every single time, the people who focused on goals did worse and less than the people who focused on the process. The real kicker, though, is that the goal-focus people felt really motivated, thought they were doing loads, wanged on about it and bigged it up... The process-focus people just kept on quietly moseying along, doing better and more. Remember that, when someone tells you how awesome goal-setting is and how productive and motivated they feel, having goals: they do believe that, but they're wrong about it working. (I have a separate post on this if you want to delve into it more: The Joy Is In the Doing.) And for the record: the worst kind of writing goal you can set is word count. Lorem Ipsum can generate word count. We're clearly not after just word count.
Without goals, though, how do you protect and prioritise writing, in the face of the rest of life's demands? Set time, not goals. Carve out the time, protect it like an angel with a flaming sword, and within that time, be free. Focus on what you're doing, not what you want to have done. Fiddle about with when the time should be, how long at a time works for you, ways to protect it, but work on setting the time.
10 Join the circle of writers
The archetypal writer, we're taught, is shivering alone in a garret, working independently on their striking original masterpiece. This is nonsense. Yes, many writers are introverts, but introverted or not, we are still social animals and we flourish, our creativity flourishes, in conjunction with others. Reading the acknowledgements pages of any novel is always staggering, when you see just how many people helped, and how. Bouncing ideas off other people works better than always working alone. We can see and solve other people's creative dilemmas much more easily than our own – and in return, they can do the same for us. Having readers and feedback is motivating and keeps you going when you hit a hurdle or a dry patch. And other people can do the one thing we can never do for ourselves: tell us how our vision is coming across on the page. We always know what's meant to happen, the effect we want to create, but we can't escape our own knowledge: only other people can tell us what is happening, the effect they're experiencing.
My sister's graphic design blog
shared this wonderful quote about finding one's tribe : "I lived outside community, I lived without a tribe.
I needed women to listen to my pain and honour my tears. Then I needed
women to tell me it was time to dry my tears… and do something. ... The best thing I ever did
was tiptoe out of isolation and join the circle of women." It's the same with writing. We need to tiptoe out of our isolation and join the circle of writers.
I have two blogposts on writers' groups, one on running a group and one on giving and receiving feedback. The circle doesn't begin and end with a single writing group, though. That's one part of a larger community. Make friends with other writers. Swap work with them, beta-read for each other, pass on details of journals you've spotted, go to fiction conventions, support other people's readings and book launches. If you're shy and introverted, you're in good company: most writers are! These are your people!
I try to foster what links between writers I can, through the courses, and have gradually learnt to do this more explicitly: by starting an online community group for everyone who's been on the courses and workshops, by encouraging classes to have WhatsApp groups and start writing groups, by including social evenings in the courses, by having Summer Drinks (which will resume when we can do things like that), and, when the world permits, we'll have a fabulous ten-year-anniversary celebration party.
Meanwhile...
Happy writing and thanks for being part of my writing community!
I met Tim Major when he came on the Story Elements course in 2012. When he published his first novel recently, I invited him to write a guest post on the most useful thing he'd learnt about writing through that novel.
Never discard anything. Plenty of readers and writers will recognise this impulse, at least in terms of their book collections. I struggle to cull any book from my shelves, including those I’ve read and those I suspect I never will read. However, I’m thinking more in terms of writing.
Never discard anything. Not only is writing anything a worthwhile exercise, any completed piece of writing is worth keeping.
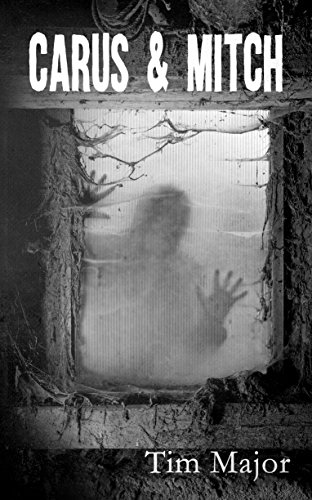
Here’s a case in point. My first published novella, Carus & Mitch, began life as a YA (Young Adult) novel. It was my second attempt at writing a novel, a more-or-less academic exercise along the lines of NaNoWriMo (in which would-be novelists attempt to write 50,000 words of fiction in a single month, without backtracking or engaging their ‘inner editor’). I didn’t have high hopes of the novel being publishable – and it wasn’t. However, the first three chapters, in which the two young female protagonists lived in isolation within a remote house, were pretty good. The following summer, I ripped out and rewrote the first three chapters and reworked the ending entirely. The novella was published in 2015, reviewed well, and was shortlisted for a This Is Horror Award. (Megan Kerr critiqued part of the original YA novel as part of a Writers’ Greenhouse course in late 2012, and her notes were invaluable, despite the fact that that particular chapter was culled entirely. Thank you, Megan!)
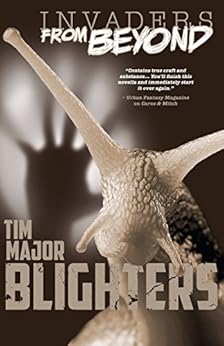
While I enjoy writing short stories for their own sake, with hindsight I’ll often find that they’ve acted more as testing grounds. Perhaps it’s something subconscious – perhaps it’s just easier to commit to developing an idea into a short story, rather than diving into writing a novel. Before submitting to magazines, I’ll sometimes reread a story and then realise that the aspects that now seem most interesting are those that have been left out. My second novella, Blighters, began as a 16,500-word story and became 30,000 words in its final form when it was published in July 2016.
My first published novel, You Don't Belong Here, was originally a 7500-word story about a man who steals a time machine and then hides in a rural manor house in order to conduct tests with it. I wrote it when my wife was pregnant with our first son. Then, three months after Joe was born, I looked again at the story and found that the subject matter seemed oddly suited to my current state of mind. Daniel Faint’s disorientation at his continual leaps forwards in time, his uncertainty about the time and date, his panic about what might have happened in the interim period, felt like an analogy for my child-induced sleeplessness and drowsiness. I reworked the story to take into account these new personal hooks – that is, my own permanent state of disorientation, plus a preoccupation with family and fatherhood. The story grew and grew to become a novel. All of the elements of the short story remain, but now the short story feels like little more than a synopsis of the plot elements. The psychological element was all new.
So, there’s my advice. Never discard anything. Rework failures and mine your shelved stories for anything salvageable. Sometimes the story will only become apparent the second or third time you have a crack at it.
Tim Major's time-travel thriller novel, You Don't Belong Here, (Snowbooks) is available now. He has also released two novellas, Blighters (Abaddon) and Carus & Mitch (Omnium Gatherum) – the latter was shortlisted for a This Is Horror Award. His short stories have featured in Interzone, BFS Horizons and numerous anthologies. He is the Editor of the SF magazine, The Singularity, and blogs at www.cosycatastrophes.wordpress.com.
I strongly second Tim's advice and it's something I've found to be equally true in my own writing. When I wrote about the things I learnt in the Rope of Words series, one of the most useful things I learnt was the same: Keep your fragments.
Love your laptop. Turn the lights low,
open some wine, put on some music...
This post series is the techie tricks to make your writing life so
much easier, with all the nifty little things you can do on Word. You
can read the first post here.
Once you've learnt how to set up the Styles for your writing, you realise you don't want to faddle about with that every time you start a new story. There must be an easier way. The whole history of computing boils down to "How can I make the computer do this for me?" And there is! Templates! You're going to open a new document, set up the styles and some other useful settings, and then save it as a template. Then every time you start typing up a new story, you create a new document from that template, and everything is already set up.
How to create a writing template
Open a new document
Set up your Normal and Normal_new styles - if you can't remember how, or haven't read the previous post, here's how. More practice!
You could head Straight to Go, Collect £200 now, but how about a few other useful settings? Add some page numbers. On the Insert tab, click Page Number and then Bottom of Page, Center. (That's standard, you can put it wherever you want.)
Good margins are always useful. Narrower text is easier to read plus agents and publishers want proper margins, none of this 2cm on each side malarkey. I recommend the original defaults: Top & Bottom margins of 2.54cm, Left and Right margins of 3.17cm. To set your margins, click the Menus tab,then the Page Setup button, and then select Margins from the dropdown list.
If there's anything else you're always doing to your writing documents, now's the moment to do it! Once you're fully skilled up in my smartypants ways, you'll be adding field codes and macros and all sorts. But don't worry about those for now, you can always add them later.
Save the document as a template: click the Office button, move down to Save As, and choose Word Template.
The dialogue box will open for you to name and save your template. It should automatically save the template in the right place, with all the other templates. (We'll check in a moment that it has; if not, I'll tell you how to move it to the right place.) Give it a nice name and click "Save".
You've made your first template! Now you can go crazy and make templates for everything you do a lot - letters, poetry, recipes, whatever.
How to create a new document from your template
Click on File, then choose New.
In the options that appear, click on My templates. (In older versions of Word, the options will appear on the right hand side, and you need to click on On my computer... Also, for some versions, you might need to choose the option Personal templates.)
A dialogue box will open of your templates - click on the one you want. In this case, Novel.
A new document will open based on your template - so it has all the settings and the styles you created in your template. Result!
If it's all worked, you can scroll on down to tweaking your template's styles. If you can't find it, here's how to sort that out:
How do I find my template?
Your template should have automatically been saved in the right place. If it wasn't, then we need to find the right place and put it there. Every version of Windows / Mac, and apparently every version of Word, keeps the template in slightly different places, so the easiest way is just to search for it. These are instructions for PC users - any Mac users, feel free to shout instructions in the comments and I'll add them.
You're going to search for where templates live on your computer and open that folder, then search for your template and open that folder, then drag your template to the the proper template home.
Open Windows Explorer.
On the left, click on the C: drive (to search the whole computer)
In the Search Box (top right, picture of a magnifying glass) type the name of the normal template and its extension: Normal.dotx (or for old versions of Word, Normal.dot) and press Enter. Wait while it peruses all your files. This may take some time, so maybe make a cup of tea while you wait. (Normal is the standard Blank document template, so we know that'll be in the right place.)
Once it's found it, click on it, right-click, and select Open file location. That'll open a new Windows Explorer window in the folder where it's stored. You should be able to see on the left and along the top where it's stored. Mine is in C:/Users/Megan Kerr/AppData/Roaming/Microsoft/Templates.
Open a new Windows Explorer window, and search for your template - eg Novel.dotx. Again, once it's found it, click on it, right-click, and select Open file location.
If your two windows are full-screen, click on the Restore-down button in the top right, next to the close button. Restore-down is the middle button:
You should be able to see both your windows now. Drag your template from wherever it's hiding into the same window as the Normal template.
Your template's in the right place now, so you can scroll back up to create a new document from your template.
How to change styles and add new styles in your template
We already set up the styles in your template, but as time passes, your tastes might change - you want more line spacing, or a different heading font - or you might develop new styles you want in all your writing. Then you find you're modifying your styles every time you use your template... Noooo! That's what we wanted to leave behind! But we CAN leave it behind. There's another little trick, which consists simply of a tick:
Add a new style or modify your style as usual. If you can't remember how, here's how.
In the Modify Style window, once you've made your changes, look at the bottom left. You'll see a tick box for Add to template. Tick it.
Click OK.
When you save your document, it will ask you if you want to save the changes to the template as well:
Click Yes.
You're done! It's so easy! This is just for styles, though - if you want to make changes to margins or anything else, you need to open your template.
How to change your template
First you need to find your template in Windows Explorer, so if you don't know how, scroll back up to How do I find my template? I've added my template folder to my libraries, so I can find them easily. (Once you've found it, right-click on the Template folder and choose Include in library.) Then...
In Windows Explorer, right-click on your template.
The right-click options will open up:
Choose Open not New. New is in bold: that means it's the default option, so if you double-click on the file, it will create a New document based on that template. By right-clicking, you've brought up the Open option.
The template itself will open. You can then make any changes you want to. When you're done, just click Save and close it.
This post series is the techie tricks to make your writing life so much easier, with all the nifty little things you can do on Word. You can read the first post here.
Once you've put proper headings in your document, you're already using the Styles and Formatting - and it has a ton of brilliant uses besides the headings and the document map. You can customise it so your headings look exactly how you want, and you can also set it so it does proper layout for you, without you having to press tab all the time. If you're not sure what story layout should look like, compare these two documents:
If your story or book looks like the one on the right, hurrah! You're using sections and paragraphs like a pro! If it looks like the one on the left, every paragraph flush with the margin and white space above it, you need to shoot off and read this post on layout, and spend some quality time flipping through the books on your shelves, saying "Ohhhh..."
Proper layout does all sorts of useful story-things, but all those indents mean a lot of enter-tab, enter-tab, when you'd rather be concentrating on the writing. So you set up your styles to do it for you! And you do that by customising your styles.
We'll start with customising your headings, to cover the basics, and then go through setting up proper layout. As before, if you feel nervous, use another document to play around.
The golden rule of Styles and Formatting
This is the golden rule of Styles and Formatting: except for italics within the writing, never make formatting changes to the text itself: change the Style instead. It's so important I'll put a box around it:
Change the Style not the text formatting.
Want a pretty font for your headings? Don't select the heading and change the font - change the heading style! Want your writing in Times New Roman instead of Cambria? Don't select the text and change the font - change the Normal style! Want indents and a special font for the text messages your characters send each other? Don't just change the formatting for that bit - create a new style!
Why? For a short story, doing formatting by hand doesn't cause you problems - it's only a few pages. And for the first 10,000 words of your novel, you won't notice any issues either, probably. By the time you finish your novel, though, it's probably at least 80,000 words. And then you've written it in Calibri point 11, because that's what you like, but the agent says "Times New Roman or Cambria only not Calibri, point 12" because they hate Calibri and want good-sized text. And then you have to change everything. But you can't just select everything and say "Times New Roman, point 12" because you also have those text messages, remember? And the headings. And that innovative stuff you did in the middle, to mimic Google search results. And then you're trawling through your whole document trying to fix it and change it, and it's not just a few pages, it's over 200. But if you're using Styles instead, you make a few quick clicks and - voilà!
How to customise your headings
The in-built headings are often ugly, a bit corporate, or just look too much like the documents you see at work. Make them your own!
On the Home tab, right-click the style you want to change and choose Modify.
A box will spring up in the middle
Click Format to change the settings.
Choose Font to change the heading's font, colour, size, whether it's underlined, small caps, all caps, etc:
Then click OK to get back to the Modify Style box.
Choose Paragraph to change the alignment, and the space above and below it. Don't use extra Enters to create space - use the Styles:
On the second tab of the Paragraph box, you can tell it to start a new page automatically. If you want each chapter on a new page. Click Page break before.
Then click OK to get back to the Modify Style box.
Click OK in the Modify Style box.
Done! You can play around with your heading settings to your heart's content, use colour, have a font that matches your novel, anything you like. (And then before you submit it to a publisher, you can change it back to a sensible font by changing the style again.)
If you fancy losing yourself down a font rabbit hole, have a look at Dafont's collection. Most of them are free for personal use and you can just download them. Once they're downloaded, open the zip file, drag them onto your desktop, then drag them into C:/Windows/Fonts to install them. Hours of fabulous WAB! (Writing-Avoidance Behaviour.) Be careful with sites you don't know, though - I've had viruses bundled into font downloads before. Dafont is safe.
How to create your story layout styles
You're going to do the exact same thing, but with a few extra settings, for your story layout styles. You need two styles: Normal will be your paragraph style, indented, with no white space above. Normal_new will be for the start of a new section, not indented, with white space above.
Just like you did for the heading, modify the Normal style:
On the Home tab, right-click the Normal style and choose Modify.
A box will spring up in the middle
Click Paragraph and change the Indentation to First Line - 0.63cm.
I also change the Line spacing to Multiple - 1.15. I find that's easier on the eye than single-line spacing, but you still get a good amount of text on the screen.
Click OK to get back to the Modify Style box.
You can also change the font settings if you want, and when you're done, click OK all the way out.
NOTE: This might make all your headings indent as well! That's because all your styles are based on the Normal style. That's fine - just go into any headings you're using, modify their style, and set their indent to None. Yay! More practice!
Now you're going to create the Normal_new style, for new sections:
On the Home tab, right-click the Normal style and choose New Style.
The box will spring up in the middle:
In the Name box, type Normal_new. (You can call it whatever you like.)
Underneath the sample text, you'll see it says "Normal +". That means it's based on the Normal font, so has all those settings, plus whatever you're going to choose now.
In Style for following paragraph, click the down arrow and choose Normal.
This is genius. It means when you start a new section, and then press Enter, the next paragraph will automatically be the right style - a nice indented paragraph!
Click on Format then Paragraph to open the paragraph settings. Change the Indentation to None and the Space Before to 12 pt:
Click OK to confirm.
In the Modify Styles box, look below the Preview section and you can see that your new style's settings are Normal + First line: 0cm; Space before 12pt. That means any other changes you make to Normal, except those two extra things, will also apply to this Style. So if you change Normal's font, this one's font will change too. Brilliant! That's because the style is based on Normal (as it says in the box).
Click OK.
You now have your two headings set up! Whenever you start a new section, you click the style Normal_new, and it automatically adds the white space above it and goes flush with the margin. When you press enter at the end of that paragraph, the next paragraph will automatically be Normal, so it will be indented with no white space.
That's the essentials! If this has been a steep learning curve, I suggest you go away and play with this a bunch, then come back later once you feel it's properly under your belt. If you fancy delving a little more, read on...
Go wild with your styles!
Any time you need particular formatting, you can add a style to do that for you. You don't need to make a style for italics in the text, like this, but for most other stuff it's useful. For example, in my novel, I have two separate story strands with two separate fonts, so things set in the other world have the styles Otherworld and Otherworld_new. I also have styles for text messages, which are heavily indented, use a smaller point size, and use MS Sans Serif font. I have fonts for newspaper headings, because the novel has a bunch of those. You own your computer, you tell it what to do, you create your wonderful repertoire of styles however you want.
How to create character styles
Most styles you create will be Paragraph styles - ie they apply to the whole paragraph. Sometimes, though, you have a bit of text inside a paragraph that needs a special setting - so you want to change just those particular letters. ("Characters" means letters, here, not your imaginary people.) In Rope of Words, I had the "titles" the woman thought her story would have plus the words that had a physical existence in the story:
If I created a paragraph style, it would change the whole paragraph, not just those words. So you create a character style:
On the Home tab, right-click the Normal style and choose New Style.
The box will spring up in the middle.
In the Style Type box, click the down arrow and select Character:
Now, if you click Format, you only get options that apply to the characters, not the paragraph:
Make any font settings you want. I made my "physical" words Book Antiqua, 12 pt, bold, with a shadow. Click OK all the way out.
Of course when you start your next book, you'll want some of the same styles, at least the Normal and Normal_new already set up. And if you're writing lots of short stories, then you'll be wanting new documents with those set up all the time. So we should probably look at templates, next! In the meantime, have a play with this, have fun, make things silly colours and crazy fonts, OWN the machine! Love your laptop! And when you've had a good play, here's the next post on how to make your own templates.
You absolutely don't need a specialist programme to write a novel. Word can do everything you need, it's almost infinitely customisable, you probably already have it, and at the end your document is in the format publishers and agents want it. They always want a .doc or .docx. Plus Word has a host of nifty little features and tricks perfectly suited to writing. Often, these aren't remotely complicated - you just need to know they exist and why they're useful for writers. So the next rash of posts will be some computery how-to on all the nifty things you can do, to make life and writing easier, so you love your laptop to bits instaed of fighting with the machine, and we're starting with the most absolutely crucial and basic thing:
Keep your novel in one single document
Every time I see a thesis or a novel in multiple documents, one for each chapter, I want to weep - not for me, but for the poor soul who's trying to work like that. There is zero reason to have separate documents for each chapter: text files are incredibly light. To put it into perspective: a single photo from your mobile is about 1000kb. (1 MB) An 80,000-word novel is about 750kb. Your entire novel uses less computer memory than one picture of your coffee. So trust me: put it all in one document. Your computer can cope.
The other reason people keep their novel chapters in separate docs is that they don't know about the document map / navigation pane. This lets you jump around your novel from chapter to chapter incredibly easily, plus you have a nifty overview of your chapter titles. If you've never used this, prepare... to be... amazed! More on how to use that below.
And here's why you should be keeping your novel in one document:
you can scroll / jump back up easily, to check minor details - eg a cameo character's name
you can change the font / formatting of the whole thing
you can do find-and-replace to the whole thing at once - if, for example, you change a character's name from Kristoff to Xavier, you don't need to open 20 documents to do it
you can spell-check the whole thing at once
you can manage different versions of the document much more easily
you can back it up to multiple places much more easily - it's just one file
you can print it out with proper page numbering and headers running through the whole thing
you can send it to the agent as a single file (and not look like a massive amateur by sending a file for each chapter!)
you can check for repetitions of particular words across the whole novel
To manage your novel in one doc easily, you need to know three things:
How to Insert > File (if you already have a bunch of separate documents)
How to use Styles & Formatting (to get your headings set up)
How to use the Document Map / Navigation Pane (so you can jump around the doc easily)
If you're nervy with computers, I suggest you play around with some other documents to start with, so you don't feel like you're learning something new and handling your precious beloved novel at the same time. The more playful and game-like you can make the learning bit, the better!
1. How to Insert > File (if you already have a bunch of separate documents)
You could open each document in turn, then copy-and-paste it into a new document, but there's an easier way.
Open a new document
Click on the Insert tab
In the Text group, click the arrow next to Object.
Click Text from file.
In the dialogue box that opens, navigate to the first chapter, and double-click that. It will be inserted into your document.
Press Enter to start a new line (in case your doc didn't) and repeat from #2 with all the chapters, in order.
Ta-da! Your whole novel's in one document! I suggest you save it as Your Novel's Name v1. (v1 = version 1, useful thing to add for managing versions.) Next, we want to get your headings set up properly so you can use the Document Map / Navigation Pane to jump around easily.
2. How to use Styles & Formatting (to get your headings set up)
Styles and formatting are one of Word's superpowers and have a fabulous range of uses for writing - plus you can customise the styles however you want. Right now, though, we're just going to stick to headings and we'll use the default settings. The next blog post will look at how to customise them to your taste.
All text is “Normal” by default – that’s body text.
Click within the paragraph or line you want to change, then choose the style from the Home tab. In this case, click on your chapter title and then click Heading 2. (If you want to save Heading 1 for the novel title.) You don't have to select the title: just put your cursor on that line, blinking away.
You can repeat that for each chapter title. You can also copy the format instead:
To copy a format from one paragraph to another, put your cursor in the paragraph whose formatting you want, and click the Format Painter button:
The next paragraph / line you click will get the same formatting. To paste the formatting in more than once place, double-click the Format Painter button. When you're finished, click it again to "put it down".
All your chapter headings are now set as Heading 2 - so now we can do the magic bit!
3. How to use the Document Map / Navigation Pane (so you can jump around the doc easily)
Once you have headings and sub-headings, you can use the navigation pane, also called the document map in some versions.
Go to View and tick Navigation pane. (Some versions might call it Document map.) The navigation pane appears on the left-hand side, showing all your document's headings. Now you have an overview of your whole novel, with all your chapter titles! Here's the navigation pane for my original document on how to do this:
Click on any heading to jump to that place in the document. You can now leap from chapter to chapter in your novel at just a click, hurrah!
Some added handy features...
You can use headings lower down the hierarchy - Heading 3, Heading 4, Heading 5, etc - to mark key sections in your novel, especially ones you want to jump back to often. This is especially useful for pivotal scenes you want to refer back to a lot. Before you submit the novel, you can easily take out those extra headings.
Each level of heading appears nested below its parent - in the example above, "Styles and formatting" is Heading 1, and the ones beneath it are Heading 2, indented. You can click the little arrow to show or hide those subheadings.
Whichever section you're in shows as selected in the navigation pane - usually as that warm yellow highlight. That's incredibly handy for some of the more avant-garde stuff we'll cover, like jumping through a document checking for repetitions.
Once you've got these basics of styles and formatting, you can start bending them to your will - changing the Heading font to something splendid and spiffy that suits your novel's theme, getting the paragraph settings all nicely done for how a novel should be laid out, and so forth, all of which we'll cover in the next post.
Having a pronounced hormonal cycle isn’t often
seen as an advantage – especially in a society that generally only recognises
the PMT stage. Actually, a menstrual cycle which affects your moods a lot
can be a massive boon. You can predict weeks in advance – even months, if
you’re regular – how you’ll be feeling on a given day, regardless of the weather,
work, and what else is happening. What’s more, you can harness those
moods. And if you don't have a pronounced cycle, you can use the same info to pick the best writing task for any mood.
Any time you have a long-term project and
you’re in control of your own work flow, you can map it around your cycle,
so you’re doing the work that best suits your mood at each stage, never working
against the grain. Suddenly, everything turns to magic: you’re brainstorming
when you’re bursting with ideas, writing when the words flow, redrafting when
you’re most objective, powering through admin and detail-checking when you’re
most efficient. This isn’t just for writing; it works for any big project
with a variety of stages. I started doing this in my Honours degree, for my
dissertation and long essays, continued in my Masters, and now use it for
both my writing and my daily life. If you’ve ever tried to write a cheerful
scene when you have PMT and found all the characters just argued, you already
know that your cycle affects your writing. Here’s how to turn that to your
advantage.
First off, we’ll go through a few details about your cycle’s timing, because
the standard model isn’t one-size-fits-all. Next we’ll look at the broad-strokes
picture of what’s happening with hormones and moods, and how we can refine that
into eight stages, each with a core mood and superpower, both in general and
for writing specifically. We’ll then look at each of those stages in more detail
– what it’s like, its superpower and its other strengths for writing,
and what’s happening hormonally.
Your cycle’s timing
First, you need a few basics about your cycle,
including some info on common misconceptions. The average cycle is 28 days,
but that’s only an average. Anything between 22 and 36 is “normal” and it
can be less or more if you’re irregular. Day-counting begins with the start
of your period as Day 0. Most people think ovulation is “Day 14”, but it isn’t
necessarily. The one absolute constant in your cycle is the luteal stage:
the time from ovulating to starting your period. This ranges from 11-14 days,
so even if you have a 28-day cycle, you could be ovulating on Day 14, 15,
16, or 17. Your own luteal stage is absolutely constant, even if your cycle
is irregular: if it’s 11 days, it’s always 11 days. When our cycles extend,
we talk about stress “delaying our periods” – nope. Not possible. Once you’ve
ovulated your period will come bang on time with your luteal stage
(unless you’re pregnant). Stress delays ovulation – which is pretty
thoughtful of our bodies, if you think about it. “Wow, things seem pretty
crazy around here. Shall we get pregnant? Nah – let’s hold off on that.” PMT
typically starts 2–5 days before your period, gradually intensifying, but
again this varies: some can get it straight after ovulation, other lucky sods
don’t get it at all. (They usually don’t have a pronounced cycle anyway, though.)
It usually lifts when your period starts, but for some (including me) it can
extend a day or two into your period.
Get to know your own cycle’s timings. If you’re using a cycle tracker app,
make sure it lets you tell it your luteal stage. (I use My Calendar, which also
lets you punch a kitten when your period starts.) If you don’t know your luteal
stage, you can measure it exactly by taking your temperature each morning before
you get out of bed: as soon as you ovulate, your temperature spikes or climbs
rapidly. (Be aware that other things can also make your temperature jump: a
fever, drinking the night before, being awake up to three hours before, getting
up to go to the loo.) Toni Wechsler’s book Taking Charge of Your Fertility explains
it all brilliantly. It’s great to know your luteal stage exactly, but not essential,
unless you’re using the chart to get / not get pregnant. If you don’t know,
you can chart your temperature at some point to find out, but you can also go
by your moods, for now. As you get a feel for your own cycle’s timing, you can
start harnessing it.
The eight stages of your cycle
Broadly speaking, after your period, you move
through increasing optimism and “right-brain” creativity (that’s the yellow)
until you hit Peak Awesome, and then turn increasingly focused and “left-brain”
analytical (that’s purple) until you hit Peak PMT, then you have your period
and start again. (Right-brain
/ left-brain is actually a myth, but I’m using it here for handy cultural
shorthand.) This could be equally broadly described as oestrogen rising to
a peak, then ovulation, then progesterone taking over until your period.
That’s a slightly simplistic description, though. Actually, the oestrogen
has another much smaller peak in the luteal phase (between ovulating and your
period). Those aren’t the only two hormones, either: you also have Gonadotrophin-releasing
hormone (GnRH), follicular stimulating hormone (FSH), and luteinising hormone.
After your period, the GnRH tells your pituitary gland to release the FSH,
which tells your ovaries to start developing follicles; the luteinising hormone
gives that fabulous high just before you ovulate. With all this, there’s
more to your cycle’s moods than just “normal – PMT – period” or even “normal
– ovulation – normal – PMT – period”. When we put together the various effects
of all those rising and falling hormones, we can actually divide the cycle
into eight different stages of core moods: calm, happy, joyful,
yay, focused, sharp, dark, retreat.
(Note: The length shown here for each one is a guide
only. I’m basing this on a 28-day cycle with an 11-day luteal stage, 5-day
PMT, and 4-day period – your own numbers will likely be different, so adjust
for your own cycle accordingly. Also, most of the stages shift into each other,
rather than having neat start-times and cut-offs, as shown by the colour
blending.)
Looking at those core moods, you can immediately
start seeing how you can harness each stage for the different activities of
your work and throughout your life. Here are the general skills for each stage:
organise, create, invent, fun, assess &
adjust, fix, admin, rest.
You can use these for anything in your life. At university, I used it for my long essays:
organise – plan my schedule, check deadlines, gather research materials;
create – initial research, entering the ideas, learning new things;
invent – make the big connections and leaps, rough out the first draft;
fun – take a day off to party; assess & adjust – revise
the first draft and rework it into solid second draft; fix – make smaller
corrections and edit; admin – sort out references and proofread; rest
– hand in the essay and curl up with a book and a hot water bottle. I use
the same cycle in my daily life. I plan my month and meals in the organise
stage. I do most of my cooking in the create and invent stages,
freezing batches for later. Housework happens throughout, but I’m more likely
to decorate in the first half and deep-clean in the second half. I socialise
more in the first half – partly because that’s when I’m more in the mood;
partly because my endometriosis pain is less then, so it’s easier to go out.
I always want to go out on the fun day! I do my finances, tax,
and decluttering in the fix and admin stages: my tax form’s
always completed months in advance, because I can rely on a good bout of PMT
to sort it out.
The same cycle of activity maps beautifully
onto writing. While you can usually manage to do most things at most times,
each stage has its superpowers, so why not use them? Here are the core superpowers
for writing: : submissions, writing drafts, brainstorming,
fun, redrafting, proofing, typing up, resting.
The eight stages in detail
Each stage has its core mood, its superpower, and
a batch of skills. For the graphic, I’ve selected a particular thing as each
stage’s writing “superpower” – that’s the activity I tend to save for that
stage – but each also has a batch of other activities that suit it beautifully.
For each stage, we’ll look at what it feels like, its writing superpowers,
other writing activities it’s good for, and what’s happening hormonally. Although
medics count from the start of your period, it makes more sense for us to
start when the period’s over – that’s when we have the sense of a new month
beginning.
Remember, the number of days given here is a very
general guide only. As I said, this is based on a 28-day cycle with an 11-day luteal stage, 5-day PMT,
and 4-day period – your own numbers will likely be different, so adjust for
your own cycle accordingly.
Stage 1: Calm (± 3 days)
Your period has just finished. This is a “white”
state of calm orderliness. All is sane. No hormones are tugging you anywhere
– hormones aren’t even a Thing. It feels almost prepubescent. It’s a lovely
stage for rebalancing life: creating a tidy desk, drawing up meal plans, having
an orderly schedule, and mapping the month ahead with measured, realistic
plans. For writing, it’s an O-negative state: you can use it for pretty much
anything you want, although if you need to brainstorm brand new ideas or write
an exciting pitch, you might want to wait till the joyful stage. It’s
also practical, factual, and objective, given to neither highs nor lows, and
very capable.
Superpowers
writing covering letters and synopses
sending out submissions
Also good for
rereading a draft to identify what’s working, what needs cutting, what
needs reworking
any other writing activities (except possibly brainstorming new ideas and
writing exciting pitches)
What’s happening hormonally
Around PMT and during your period, both your oestrogen
and progesterone levels plummeted. Now, things are balancing out. Your oestrogen
levels are rising again, but only very slowly right now. The GnRH is giving
the FSH its orders, but the oestrogen is inhibiting that a bit, because your
womb isn’t ready yet. Meanwhile, the oestrogen is also starting to develop
your womb lining (the endometrium). Nothing is at high levels, though, hence
the sense of prepubescent calm.
Stage 2: Happy (± 5 days)
You’re starting to move towards fertility and ovulation,
getting increasingly happy and optimistic. You’re getting more creative and
more “right-brain”, less judgemental of emerging ideas and emerging work.
You’re not yet in the full-blown optimism of fertility, though, so you’re
well balanced between judgement and creativity, and generally cheerful.
Superpowers
writing first or second draft
reworking passages you identified in the calm or focused
stages
generative research – the kind of information that will affect the
story’s shape
Also good for
mapping plot trajectories
opening up new seams in a story
What’s happening hormonally
Your oestrogen levels are continuing to rise gradually,
bringing that steadily increasing sense of optimism.
Stage 3: Joyful (± 5 days)
By now you’re fully fertile, horny, and pretty damn
rocking! If you’re not sure when you move from the previous stage to fertility,
you can check your fertility by slipping a finger inside yourself to see what
the fluids look like. The white opaque stuff, a bit like hand cream, is early
fertile fluid. The slippery transparent stuff, a bit like eggwhite, is super-fertile
fluid. As your fertility increases, so does your optimism and creativity.
This is a brilliant time for BIG BOLD IDEAS. Whenever I need to launch into
something completely new, this is the time I mark for it.
Superpowers
brainstorming new ideas
coming up with large-scale plot trajectories and major insights / connections
starting new stories or new seams within a story
writing uncritical first draft
writing exciting / challenging scenes fearlessly
Also good for
continuing with a first or second draft
reworking passages you identified in the calm or focused
stages, especially longer or more challenging ones
writing sex scenes
What’s happening hormonally
Your oestrogen levels are rising sharply to their
peak. This peak of oestrogen will shortly release a wave of FSH (the follicle
stimulating ones) and of luteinising hormone, which both make sure you ovulate,
and will result in…
Stage 4: YAY! (± 1 day)
PURE GOLD! You’re a goddess! (Or a god.) Hedonism
time. Life is amazing, everything’s brilliant, and you’re gorgeous! This is
usually the day or two before your egg releases, when you’re just made of
sumptuousness and sensuality, and you’re walking on air. You could have a
marvellous writing day, but you probably don’t want to be in a room on your
own all day – why waste all that fabulousness?! – so dress up! Go write in
a park! Be fabulous! Or just run around drinking champagne and being amazing.
The world is your damn oyster. Don’t bother editing or doing anything serious,
you’re far too much fun for that.
Superpower
drinking champagne (strictly speaking not a writing activity, but c’mon.
It’s one day.)
Also good for
writing sex scenes
writing uncritical first draft (bearing in mind it will likely turn into
sex scenes)
What’s happening hormonally
You’re surfing a massive wave of luteinising hormone,
and the FSH is also spiking, which together make sure the egg’s released.
Oestrogen is at its absolute peak (although about to drop).
Stage 5: Focused (± 5 days)
You’re getting calmer now, more focused, and more
“left brain”. Your egg releases and the golden tide of fertility-vibe reduces,
but you’re not yet approaching PMT. This stage is about as evenly balanced
as the calm stage, but it doesn’t feel prepubescent. Your judgement
of your existing work is in a superb Goldilocks spot between optimism and
pessimism.
Superpowers
rereading a draft to identify what’s working, what needs cutting, what
needs reworking
editing thoughtfully for better flow and for overall arc – anything
that’s got too excitable or too dark in other stages can be trimmed and adjusted
here
Also good for
continuing to write an existing story or seam within a story
research of the generative kind – the stuff that affects your story’s
shape, rather than just minor details to get right, especially material that
needs more focus and less distractibility
What’s happening hormonally
As soon as you ovulated, your oestrogen levels dropped
sharply, and then plateaued. Your progesterone levels are starting to rise,
but aren’t yet too high. (The luteinising hormone told your empty egg sac
to start producing progesterone, after the egg’s release. The progesterone,
in turn, tells the FSH to back down, so the ovaries won’t be maturing any
more follicles until the next round.) The progesterone is rising slowly, though,
and so far is about the same level as the plateaued oestrogen, so they’re
fairly even balanced, hence the overall calm. As the progesterone continues
to rise, the oestrogen also rises a little, so the two stay fairly balanced
for now.
Stage 6: Sharp (± 2 days)
You’re increasingly left-brain now, sharp, analytical,
and tending towards critical. All this, combined with increasing impatience,
can make you superbly efficient and damn precise – mistakes irritate you,
so you fix them; wasting time is annoying, so you work swiftly. You’re tilting
towards PMT – the last day of this stage is actually the first day of PMT,
for me, but it’s not the miserable kind yet, I just hit Peak Rightness: I
am very very Right, about Everything, and everyone else, especially on the
internet, is Wrong. I don’t count that with the Full PMT stage, because that
hard confidence and authority is very useful and fits better with the other
activities in this stage.
Superpower
powering through writing-related admin
Also good for
research – moving more towards fact-checking now than generative
research; it won’t necessarily affect the story shape if the protagonist gets
10cc or 20cc of x medicine, but it matters to get the details right
spotting and fixing inconsistencies
editing down heavily and cutting out chunks (though keep a weather eye
on this, as explained below)
sorting and decluttering your writing papers (likewise, with a weather
eye)
This is also a great stage for decluttering generally,
but keep a weather eye on yourself. You might, in restless impatience, throw
out things you really should be keeping, so if you’re unsure, put it in a
Holding Pile to revisit another time – especially regarding handwritten novel
notes. Similarly, in brisk ruthlessness, you may delete chunks that should
actually stay in the story, so a) make sure you save a new version before
editing, as always; and b) watch out for anger/impatience levels while you’re
editing. If you move from ruthless efficiency to restless impatience, stop
editing. You also need to watch for when you switch into the next stage. One
moment you’re thinking, “This bloody vase?! We never use it! OUT, OUT, damned
vase!" and a minute later you’re weeping over it: “I remember when we
bought this... Oh god, we lived in that house with the cherry tree, and we
went to the charity shop together... The air was golden with the dust of leaves...
I had so much hope, then!" If that happens, you've passed into the next
stage.
What’s happening hormonally
The Age of Oestrogen Is Over. The Age of Progesterone
Has Begun. Your oestrogen is actually still rising slightly, but the progesterone
is rising faster and rapidly taking over. The progesterone is responsible
for the increasing irritability and is also developing your womb lining (the
endometrial tissue), so a fertilised egg can settle in.
Stage 7: Dark (± 4 days)
PMT hits in full now. The range of feelings vary,
but generally include a pick-and-mix of the following: irritability, anger,
misery, low self-esteem, weepiness, pessimism, hypercriticism. Other fun side
effects include bloating, water retention, and assorted toilet troubles. Don't
edit, you'll just delete everything. Don't declutter. Look after yourself.
You may want to take these days off, especially if your PMT is short-lived.
That said, you can work very usefully during this time, provided it’s purely
objective work, with zero subjectivity required, and that’s often a relief:
somewhere practical to put your mind and a sense of usefulness can really
help with PMT.
Eat chocolate, especially if you keep working. For
years I didn't eat chocolate during PMT, because the book I was given on How
To Be An Adolescent said a) don't make an awful bloody fussy about it, get
over yourself already you silly little girl; and b) don't get into the habit
of eating chocolate, you'll get fat and yuck, FATNESS, YUCK. It took me until
I was 26 to stop listening to that best-forgotten book. During my Masters,
on a rainy day in Oxford, pouring and dark and deep in November, when I was
minorly suicidal and two inches tall, I bought and ate the chocolate. Almost
immediately, I returned to normal size and normal life-desire, albeit still
wet. I want chocolate precisely once a month and if my PMT isn't too bad,
not even that. This is not, on reflection, an unhealthy relationship with
chocolate. Eat the chocolate.
For all this stage is mostly bleak, it often includes
one lovely lee in the storm: FEAST DAY! This is the day on which all you want
to do is push food into your mouth, from eyes-open to eyes-closed. As with
the chocolate, I used to resist the call of Feast Day. Now I celebrate it.
If I celebrate this sudden unbounded appetite, especially for uncharacteristic
things like random street food and vendor vans, but even more especially for
the holy hash brown (the sacred food of Feast Day), then it's actually a delightful
day. If we're on the Cowley Road, I go into every shop and buy a cross-cultural
assortment. Sometimes I go to M&S and stock up on party / picnic nibbles,
and then eat all of them by turns and wantonly. People say, "Oh, oh,
it's the progesterone blocking your reward pathway, that's the only reason
you don't feel full" – funny how people only want to admit progesterone
side-effects when they're trying to control our behaviour back into culturally
prescribed norms. Who cares? It's one day a month, if that. Eat. FEAST. It
is the Feast Day. (Feast Day is now a recognised Thing in my household and
many of my friends have adopted it.)
Superpower
typing up work you’ve already written or typing up edits you’ve made by
hand (make it cosy and comforting for yourself with blankets, non-weepy music,
coffee / hot chocolate, etc)
Also good for
spell-checking
formatting the document properly
proofreading (not editing – just proofreading for punctuation
and for misspelt words that a spell-checker misses)
What’s happening hormonally
Your progesterone peaks, with all its side-effects
of mood-swings and misery, and then, presuming you aren’t pregnant, both your
oestrogen and progesterone levels drop like a stone.
Stage 8/0: Retreat (± 3 days)
Your period starts and PMT eases, but the first
day or two of your period can also include PMT, so take it easy: make no demands
on yourself. You may still have PMT and now you’re menstruating and possibly
cramping as well. Curl up with a book, film, or TV series and a hot water
bottle. Eat more chocolate. Have a little weep. As your period continues,
the PMT eases and you start to feel a bit happier again – but often still
quite sore, so keep taking it easy. Take a day or two to recover; having PMT
and then cramps on top of that is a hectic demand on your system, and you
don’t have to leap back into the fray the instant you feel marginally less
than awful. Enjoy some recovery; life isn’t a sprint. Everyone takes time
off and the rest of the month is now fabulously productive, so it’s fine to
take the time off when you need to. I get exceptionally bad cramps (because
of endometriosis) so I usually retreat to the sofa and if I can work at all,
I do purely objective work, as for PMT. The second and third days are usually
the worst, for me; by the fourth day, I’m back up and about, and moving (mentally
at least) back into Stage 1.
Superpower
Blanket Forts
Also good for
typing up work you’ve already written or typing up edits you’ve made by
hand (unless you’re too sore to sit at a desk – typing up while you’re
on the sofa will give you a crick in the neck)
spell-checking
formatting the document properly
proofreading (not editing – just proofreading for punctuation
and for misspelt words that a spell-checker misses)
any other completely “left-brain” writing work in your skillset –
for me, Photoshopping graphics or working on my website’s CSS
What’s happening hormonally
Your oestrogen and
progesterone levels have bottomed out. The other three hormones aren’t really
in play yet. Your womb is shedding its lining (its endometrium), as it’s not
needed this round for an egg to implant. As things start to lift, your various
hormones creep back into play, and the cycle swings back round.
The full writing cycle
(click to enlarge)
Putting it into practice
That’s the theory – so how does this work
in practice? I’ve been working and writing like this for 17 years (220 cycles,
give or take) so I’m pretty au fait with the stages, by now. At first, in
university, I drew out my cycle on the calendar and mapped out a precise plan
of when to research, when to draft essay plans and structure, when to write
up, when to edit, and when to proofread and file things. These days, I play
it more loosely, because I’m used to rolling with this flow.
Not every month is equally pronounced: some
months, I’ll continue writing first-draft or keep editing throughout and only
notice the extremes – when my first draft turns to arguments during the dark
stage, when I struggle to focus on meticulous editing during the joyful
stage, when I’m struggling to start a new section during the dark stage
and it feels like writer’s block. When that happens, I know why and I can
change activities accordingly. Some months are very pronounced, and I shift
around the activities like clockwork. When I plan my month in the calm
stage, I check my cycle tracker and avoid scheduling writing days for the
dark Peak PMT time, unless I have lots of typing up or proofreading
to do. Depending on what my writing needs, I shift the bulk of my writing
time to the first or second half of the month. (I always have some every week,
though: it’s my sanity.) If I need to brainstorm for a Call For Submissions
or a new seam of the story, I mark the golden joyful time for that,
and in the meantime I can edit, research, continue writing something else,
any of the dozens of other options as appropriate. If my writing day falls
on an early-period day, I swap it around with a weekend day, so I can just
rest and whimper when I need to. I’m often irregular, so I also play it by
ear. If the part I’m currently writing isn’t “on schedule” for the next stage,
I switch between parts of the novel: leap ahead to brainstorming or generative
research, or edit / fact-check earlier parts. It all needs to happen; it all
does happen.
It may seem disconcerting at first to consider
writing like this – even inefficient. Surely a “serious” writer should just
write all the time, every day? But for pity’s sake, think about who that advice
comes from. Hemingway’s “write every morning”. Roald Dahl’s daily sessions
with sharpened pencils. Terry Pratchett’s 400 words a day, regardless. Stephen
King’s ten pages a day. Khaled Housseni’s “You have to write every day, and
you have to write whether you feel like it or not.” Not one of them had or
has a hormonal cycle. You wouldn’t follow their example on not using tampons,
as if you didn’t have a cycle, so why follow their example on scheduling,
as if you didn’t have a cycle? You do. They don’t. And none of them had or
has the advantage of knowing exactly when they’d feel most creative and generative,
or when would be best to edit dispassionately, or when it wouldn’t be a good
writing day so best just to type up what’s already written. All of these things
are part of writing; all of them need to happen. It’s not inefficient to shift
your writing activities according to your cycle: doing each thing when you’re
best suited to it is the most efficient way possible to work – and thanks
to your cycle, you get to do that. Use your superpowers. Write around your
cycle.
Incidentally, I wrote the rough draft of this post during
the joyful stage, some time ago. I returned to it and pulled it together in
the focused stage, then used the sharp stage to fact-check it and run it past
people. During PMT I proofread it and added a few cross observations. When
my period started, I was too sore to move around, so I spent much of the evenings
and weekend building the graphics. I tried to add a bit more, but couldn’t
get the words to flow, so just threw down some markers. I returned to it in
the calm stage to give it a final once-over, add those extra bits, temper
some of the cross bits, and evaluate it as a whole.
If you'd like new blog posts, course news, and free Writing Skills sent to you by email, add your email here:
I won't share your email with anyone else. You'll get emails from me only, when a new blogpost is published, and about once a month with updates about the courses and a batch of free Writing Skills. All emails are sent via MailChimp and you can unsubscribe at any time. Add megan@thewritersgreenhouse.co.uk to your address book if you want to keep the emails from vanishing into spam.
Acknowledgements
My very grateful thanks to Elizabeth Walker Harby, who explained in close
detail exactly what was happening hormonally at each stage and how that related
to the core moods I’d identified. I’m also forever grateful to Dr Fernando
O Martinez Estrada, University of Oxford, for checking over my explanations
and double-checking my facts, and then cleaning my house and mopping all the
floors because I was too sore to! I have good taste in friends. Any remaining
errors or inaccuracies are mine alone.